This drop down menu made with CSS only is a horizontal menu with sub-tabs and a rounded search bar on the right side. A menu like this can be handy for users who don't need complex menus or prefer not to use one that requires scripts and/or too many images. Also, the installation and customization is quite easy and, to top it off, it is quite functional.
To see this CSS drop down menu in action, please visit this demo blog

Before changing anything, if you are using a template available in Blogger Template Designer, then you should consider doing these changes in the template, otherwise the menu might not be displayed correctly:
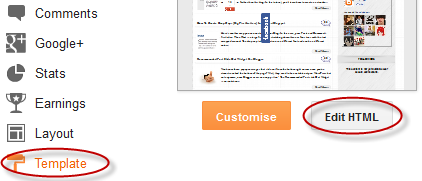
From the Blogger Dashboard, go to Template and press the "Edit HTML" button:
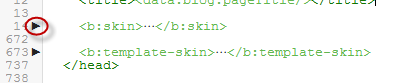
Search using CTRL + F for the following line:
Remove the code in red.
You may have many parts as the one in red, delete all you find.
....then find a similar annotation in your template:
Remove all the code you find after this annotation until you see the Headings part.
Then add this to where the code has been removed (instead of the code in green):
Step 1. From "Template", go to "Edit HTML" and just above ]]></b:skin> paste the following CSS code:
Step 2. After adding the code, click the "Save Template" button.
Step 3. Go to Layout > click on Add a Gadget link
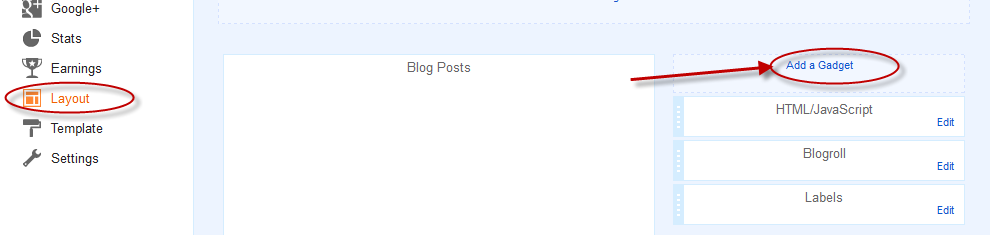
Step 4. Choose "HTML/JavaScript" and paste the following HTML code inside the empty box:
- if you need more tabs, then add a line like this just above <!-- Search Bar -->
- if you want to add a tab with sub-tabs, then add this code:
- and if you want one of the other sub-tabs have sub-tabs then remove a line like the one in orange and change it to a code like this:
And that's it... Now "Save" your Widget and enjoy this new CSS drop down menu!
To see this CSS drop down menu in action, please visit this demo blog
Before changing anything, if you are using a template available in Blogger Template Designer, then you should consider doing these changes in the template, otherwise the menu might not be displayed correctly:
From the Blogger Dashboard, go to Template and press the "Edit HTML" button:
Search using CTRL + F for the following line:
<b:section class='tabs' id='crosscol' maxwidgets='1' showaddelement='yes'>
 |
| Screenshot |
Remove the code in red.
You may have many parts as the one in red, delete all you find.
....then find a similar annotation in your template:
/* Tabs
----------------------------------------------- */
Remove all the code you find after this annotation until you see the Headings part.
/* Tabs
----------------------------------------------- */
.tabs-outer {
overflow: hidden;
position: relative;
background: $(tabs.background.color) $(tabs.background.gradient) repeat scroll 0 0;
}
#layout .tabs-outer {
overflow: visible;
}
.tabs-cap-top, .tabs-cap-bottom {
position: absolute;
width: 100%;
border-top: 1px solid $(tabs.border.color);
}
.tabs-cap-bottom {
bottom: 0;
}
.tabs-inner .widget li a {
display: inline-block;
margin: 0;
padding: .6em 1.5em;
font: $(tabs.font);
color: $(tabs.text.color);
border-top: 1px solid $(tabs.border.color);
border-bottom: 1px solid $(tabs.border.color);
border-$startSide: 1px solid $(tabs.border.color);
}
.tabs-inner .widget li:last-child a {
border-$endSide: 1px solid $(tabs.border.color);
}
.tabs-inner .widget li.selected a, .tabs-inner .widget li a:hover {
background: $(tabs.selected.background.color) $(tabs.background.gradient) repeat-x scroll 0 -100px;
color: $(tabs.selected.text.color);
}
/* Headings
----------------------------------------------- */
Then add this to where the code has been removed (instead of the code in green):
#crosscol ul {z-index: 200; padding:0 !important;}After doing this, we can finally add our menu.
#crosscol li:hover {position:relative;}
#crosscol ul li {padding:0 !important;}
.tabs-outer {z-index:1;}
.tabs .widget ul, .tabs .widget ul {overflow: visible;}
How To Add CSS Horizontal Drop Down Menu to Blogger
To add the CSS horizontal menu with submenus in your blog, follow the next steps:Step 1. From "Template", go to "Edit HTML" and just above ]]></b:skin> paste the following CSS code:
/* Horizontal drop down menu
----------------------------------------------- */
#menuWrapper {
width:100%; /* Menu width */
height:35px;
padding-left:14px;
background:#333; /* Background color */
border-radius: 10px;
}
.menu {
padding:0;
margin:0;
list-style:none;
height:35px;
position:relative;
z-index:5;
font-family:arial, verdana, sans-serif;
}
.menu li:hover li a {
background:none;
}
.menu li.top {display:block; float:left;}
.menu li a.top_link {
display:block;
float:left;
height:35px;
line-height:34px;
color:#ccc;
text-decoration:none;
font-family:"Verdana", sans-serif;
font-size:12px; /* Font size */
font-weight:bold;
padding:0 0 0 12px;
cursor:pointer;
}
.menu li a.top_link span {
float:left;
display:block;
padding:0 24px 0 12px;
height:35px;
}
.menu li a.top_link span.down {
float:left;
display:block;
padding:0 24px 0 12px;
height:35px;
}
.menu li a.top_link:hover, .menu li:hover > a.top_link {color:#fff; }
.menu li:hover {position:relative; z-index:2;}
.menu ul,
.menu li:hover ul ul,
.menu li:hover ul li:hover ul ul,
.menu li:hover ul li:hover ul li:hover ul ul,
.menu li:hover ul li:hover ul li:hover ul li:hover ul ul
{position:absolute; left:-9999px; top:-9999px; width:0; height:0; margin:0; padding:0; list-style:none;}
.menu li:hover ul.sub {
left:0;
top:35px;
background:#333; /* Submenu background color */
padding:3px;
white-space:nowrap;
width:200px;
height:auto;
z-index:3;
}
.menu li:hover ul.sub li {
display:block;
height:30px;
position:relative;
float:left;
width:200px;
font-weight:normal;
}
.menu li:hover ul.sub li a{
display:block;
height:30px;
width:200px;
line-height:30px;
text-indent:5px;
color:#ccc;
text-decoration:none;
}
.menu li ul.sub li a.fly {
/* Submenu Background Color */
background:#333 url(https://blogger.googleusercontent.com/img/b/R29vZ2xl/AVvXsEiRylUY9efcq92b0C2QAj7YZGbVCYaMv3GSReeAfhTamCrpHoAx6IwiluKxggA2otep00Wijb2ZXtaPM6jqrGkg0qhd0WnV0Wvvd7oxTY-be8H_wVJ3FHNG60Meimu34BKefpDcfxLRc2w/s1600/arrow_over.gif) 185px 10px no-repeat;}
.menu li:hover ul.sub li a:hover {
background:#515151; /* Background Color on mouseover */
color:#fff;
}
.menu li:hover ul.sub li a.fly:hover, .menu li:hover ul li:hover > a.fly {
/* Background on Mouseover */
background:#646464 url(https://blogger.googleusercontent.com/img/b/R29vZ2xl/AVvXsEiRylUY9efcq92b0C2QAj7YZGbVCYaMv3GSReeAfhTamCrpHoAx6IwiluKxggA2otep00Wijb2ZXtaPM6jqrGkg0qhd0WnV0Wvvd7oxTY-be8H_wVJ3FHNG60Meimu34BKefpDcfxLRc2w/s1600/arrow_over.gif) 185px 10px no-repeat; color:#fff;}
.menu li:hover ul li:hover ul,
.menu li:hover ul li:hover ul li:hover ul,
.menu li:hover ul li:hover ul li:hover ul li:hover ul,
.menu li:hover ul li:hover ul li:hover ul li:hover ul li:hover ul {
left:200px;
top:-4px;
background: #333; /* Background Color of the Submenu */
padding:3px;
white-space:nowrap;
width:200px;
z-index:4;
height:auto;
}
#search {
width: 228px; /* Width of the Search Box */
height: 50px;
float: right;
z-index: 2;
text-align: center;
margin-top: 5px;
margin-right: 6px;
/* Background of the Search Box */
background: url(https://blogger.googleusercontent.com/img/b/R29vZ2xl/AVvXsEikxJgbrYnuAQuOSXnGEnmgPFazu6A6rWFPP1QGhhcv3x3-oOjdn-7me_f9D9ZgmPLoEgzEc5qR5r-lsLB1XlXx9ZKiZvlhFzFVAMzg3y95cmpV6rJjeCSy_nV5Ys6-r7fKLR7H10aQEfQ/s1600/searchBar1.png) no-repeat;
}
#search-box {
margin-top: 3px;
border:0px;
background: transparent;
text-align:center;
}
 |
| Screenshot |
Step 3. Go to Layout > click on Add a Gadget link
Step 4. Choose "HTML/JavaScript" and paste the following HTML code inside the empty box:
<div id='menuWrapper'>
<ul class='menu'>
<li class='top'><a class='top_link' href='Link URL'><span>Title 1</span></a></li>
<li class='top'><a class='top_link' href='Link URL'><span class='down'>Title 2</span></a><ul class='sub'><li><a class='fly' href='Link URL'>Submenu 2.1</a><ul>
<li><a href='Link URL'>Submenu 2.1.1</a></li>
<li><a href='Link URL'>Submenu 2.1.2</a></li>
<li><a href='Link URL'>Submenu 2.1.3</a></li>
</ul>
</li>
<li class='mid'><a class='fly' href='Link URL'>Submenu 2.2</a>
<ul>
<li><a href='Link URL'>Submenu 2.2.1</a></li>
<li><a href='Link URL'>Submenu 2.2.2</a></li>
<li><a href='Link URL'>Submenu 2.2.3</a></li>
<li><a class='fly' href='Link URL'>Submenu 2.2.4</a>
<ul>
<li><a href='Link URL'>Submenu 2.2.4.1</a></li>
<li><a href='Link URL'>Submenu 2.2.4.2</a></li>
<li><a href='Link URL'>Submenu 2.2.4.3</a></li>
</ul>
</li>
<li><a href='Link URL'>Submenu 2.2.5</a></li>
<li><a class='fly' href='Link URL'>Submenu 2.2.6</a>
<ul>
<li><a href='Link URL'>Submenu 2.2.6.1</a></li>
<li><a href='Link URL'>Submenu 2.2.6.2</a></li>
</ul>
</li>
</ul>
</li>
<li><a href='Link URL'>Submenu 2.3</a></li>
<li><a href='Link URL'>Submenu 2.4</a></li>
<li><a href='Link URL'>Submenu 2.5</a></li>
</ul>
</li>
<li class='top'><a class='top_link' href='Link URL'><span class='down'>Title 3</span></a>
<ul class='sub'>
<li><a href='Link URL'>Submenu 3.1</a></li>
<li><a href='Link URL'>Submenu 3.2</a></li>
<li><a href='Link URL'>Submenu 3.3</a></li>
<li><a href='Link URL'>Submenu 3.4</a></li>
</ul>
</li>
<li class='top'><a class='top_link' href='Link URL'><span class='down'>Title 4</span></a>
<ul class='sub'>
<li><a href='Link URL'>Submenu 4.1</a></li>
<li><a class='fly' href='Link URL'>Submenu 4.2</a>
<ul>
<li><a href='Link URL'>Submenu 4.2.1</a></li>
<li><a href='Link URL'>Submenu 4.2.2</a></li>
<li><a href='Link URL'>Submenu 4.2.3</a></li>
<li><a href='Link URL'>Submenu 4.2.4</a></li>
<li><a href='Link URL'>Submenu 4.2.5</a></li>
<li><a href='Link URL'>Submenu 4.2.6</a></li>
</ul>
</li>
<li><a href='Link URL'>Submenu 4.3</a></li>
<li><a href='Link URL'>Submenu 4.4</a></li>
<li><a href='Link URL'>Submenu 4.5</a></li>
<li><a href='Link URL'>Submenu 4.6</a></li>
</ul>
</li>
<li class='top'><a class='top_link' href='Link URL'><span class='down'>Title 5</span></a>
<ul class='sub'>
<li><a href='Link URL'>Submenu 5.1</a></li>
<li><a href='Link URL'>Submenu 5.2</a></li>
<li><a href='Link URL'>Submenu 5.3</a></li>
</ul>
</li>
<!-- Search Bar -->
<li>
<form action='/search' id='search' method='get' name='searchForm' style='display:inline;'>
<input id='search-box' name='q' onblur='if (this.value == "") this.value = "Search here...";' onfocus='if (this.value == "Search here...") this.value = "";' size='28' type='text' value='Search here...'/></form>
</li>
</ul>
</div>
How to Customize the Navigation Menu
- replace the text in blue and red with your links and titles.- if you need more tabs, then add a line like this just above <!-- Search Bar -->
<li class="top"><a href="Link URL" class="top_link"><span>Title</span></a></li>
- if you want to add a tab with sub-tabs, then add this code:
<li class="top"><a href="Link URL" class="top_link"><span class="down">Title</span></a>
<ul class="sub">
<li><a href="Link URL">Submenu Title</a></li>
<li><a href="Link URL">Submenu Title</a></li>
<li><a href="Link URL">Submenu Title</a></li>
</ul>
</li>
- and if you want one of the other sub-tabs have sub-tabs then remove a line like the one in orange and change it to a code like this:
<li><a href="Link URL" class="fly">Submenu Title</a>
<ul>
<li><a href="Link URL">Other Submenu</a></li>
<li><a href="Link URL">Other Submenu</a></li>
<li><a href="Link URL">Other Submenu</a></li>
</ul>
</li>
And that's it... Now "Save" your Widget and enjoy this new CSS drop down menu!
Thanks man
ReplyDeleteSuper cool menu bar. But how do you make the gap smaller between the menu bar and the date field in the (post)?
ReplyDeleteYou could add this declaration to .tabs-outer {:
Deletemargin-bottom: -50px;
Increase/decrease the "-50px" value depending on your needs.
Added this and it looks great! Quick question though when I hover over the menu the drop down opens but the drop down box isn't fully square. On the right it flows into the next menu title. Does this make sense?!
ReplyDeleteIs there a way of customising the search box? I don't want it be be a box just purely 'SEARCH............... (Then the dotted to just be a line)
Also is there a way of placing the menu above my header instead of underneath. Ideally I would like it to be top right. Tried doing this in the layout section of blogger but doesn't allow it.
I absolutely love this blog. It's people like me that aren't very confident with HTML which it's great for. Your explanations are always so clear. Thank you!
https://lucygarrick.com
1. Sorry but I don't see where's the issue, could you please make a screenshot?
Delete2. Just ABOVE ]]></b:skin> add back the CSS style for the search box found at step 1, that starts from #search { ... You can add a background to where are the annotations in green (just remove that URL and add a color hex or the url of your image (don't forget the semicolon)) or change the color of the search text (just below #search-box { add a new declaration, for eg. color: #689FD2; ). If you want to change the search text, replace the "Search here..." text from step 4, which is below the annotation in green (there are 3 of them)
3. For adding the menu above the header, please refer to this tutorial.
Hi, thanks for the tutorial. My new navigation bar is indented slightly though. How do I get it left aligned with my page title, blog post box, etc??
ReplyDeleteThanks
Hi Will,
DeleteAdd this line just below #menuWrapper { (step 1):
margin-left: -15px;
The "-15px" value represents the distance from the right side (if you add a bigger value, it will move to the right).
Sorry for the late reply!
how do i direct the links to open up in new tabs
ReplyDeleteok i got it by using the tag
ReplyDeleteWhat is red code that i ve to delete.shall remove all the code
ReplyDeleteCool tutorial i have found a website with good menu bars and other css designs you may like the designs.
ReplyDeletehttp://freebietemplate.com/css-designs/css-designs.html
have a nice day
thanks for this widget, by the way a saw your blog not using pages widget. can you please make a tutorial about modifying default pages on blogger?
ReplyDeleteThanks! Only problem is my blogs don't show the child menu's when it's put under the header widget. It shows them when in the footer or sidebar, but not at the top. It's like it's hidden behind the blog.
ReplyDeleteThanks! Only problem is my blogs don't show the child menu's when it's put under the header widget. It shows them when in the footer or sidebar, but not at the top. It's like it's hidden behind the blog.
DeletePlease add this code to Template > Customize > Advanced > Add CSS:
Delete.tabs .widget ul, .tabs .widget ul {
overflow: visible;
}
Hope it works now...!
can't find this part in my template:
ReplyDelete***
/* Tabs
----------------------------------------------- */
.tabs-outer {
overflow: hidden;
position: relative;
background: $(tabs.background.color) $(tabs.background.gradient) repeat scroll 0 0;
}
#layout .tabs-outer {
overflow: visible;
}
.tabs-cap-top, .tabs-cap-bottom {
position: absolute;
width: 100%;
border-top: 1px solid $(tabs.border.color);
}
.tabs-cap-bottom {
bottom: 0;
}
.tabs-inner .widget li a {
display: inline-block;
margin: 0;
padding: .6em 1.5em;
font: $(tabs.font);
color: $(tabs.text.color);
border-top: 1px solid $(tabs.border.color);
border-bottom: 1px solid $(tabs.border.color);
border-$startSide: 1px solid $(tabs.border.color);
}
.tabs-inner .widget li:last-child a {
border-$endSide: 1px solid $(tabs.border.color);
}
.tabs-inner .widget li.selected a, .tabs-inner .widget li a:hover {
background: $(tabs.selected.background.color) $(tabs.background.gradient) repeat-x scroll 0 -100px;
color: $(tabs.selected.text.color);
}
/* Headings
----------------------------------------------- */
***
:( ..what should i do?
Try to find the 1st line /* Tabs and delete the code until you reach to /* Columns, THEN replace it with the one above. Don't forget to make a backup first. Hope this will work for you.
DeleteThanks for visiting! :)
Go to Edit HTML >> Then Struck Ctrl + F and then Type Only Tabs.
DeletePress Enter if you are not able to find it, then Enter continuosly watching and tracking the words like /* Tabs. Then You will got this.
This comment has been removed by the author.
ReplyDeleteI think you meant to ask how to reduce the space between social media icons and the blog's header? If so, then add the following code above ]]></b:skin> :
Delete#social-icons {
margin-bottom: -50px;
z-index: 2;
position: relative;
}
"Great tips for bloggers. These tips are really very helpful and i will definitely apply them on my blogs.
ReplyDeleteThanks for share!"
I don't understand which parts in red you're supposed to delete. Could you be more specific?
ReplyDeleteI tried a few variations but nothing is working. All the submenus are all everywhere on the top, open, and without any styling.
Great post - really useful! Just a quick question: after putting the drop down menu's in, I now have a gap between the menu bar and where the content for the post starts. Is there any way of reducing this gap? You can see what I'm talking about here: http://stevenscaffardi.blogspot.co.uk/
ReplyDeleteHi Steven,
DeletePlease find this code in your template:
.main-inner .column-center-inner {
...and just below it, add this line:
margin-top: -50px;
Increase or decrease the -50px value to change the distance.
Hope this works. Thanks for stopping by! :)
BTW, if sidebars are on a lower level, then add margin-top: -50px; below this code:
Delete.main-inner {
ALSO remove the padding-top: 35px; declaration from below.
Thanks!
DeleteHi,
ReplyDeleteHow can I add content to the submenus?
This menu is great, thanks so much for the thorough tutorial. The only thing I'm having trouble with is that I'd like to size the width to be the same size as the blog header image, but when I try changing some of the code that I thought would do that, the only thing I seem able to do is get your search bar to extend horizontally out to the right, I cant get it to adjust to be the same size as the image (see here: http://ppromstories.blogspot.com/) Any advice?
ReplyDelete@Erin,
DeleteYou should change the width percentage of 100 to 110%, which is just below #menuWrapper {
Or you could add it in pixels:
width: 840px;
And to move it to the left, add this line below #menuWrapper {:
margin-left: -50px;
Where "-50px" is the distance from the left - you could also modify this value to be in line with your header.
Perfect! Thanks! I used the px and wound up having to move the margin -30 px to the left but now its all aligned. You are a miracle worker!!
DeleteYou're welcome :)
Deletehello can somebody clear it which code to remove after this and only red part of each line to remove or whole line
ReplyDeletecheck this man
DeleteLAtest and stylish drop down menu.
Good article. Prefer pixels instead of percentage. for css drop down menus/ jquery menus with source code, http://www.fremenu.info/2013/06/js10.html
ReplyDeleteJust want to say your article is as astonishing. :) The clarity in your post is just great and i can assume you're an expert on this subject.
ReplyDeletehi! great post over there...well, I just want to ask on how to move the search bar on the right side....because it appears to me on the middle...thanks!
ReplyDeleteThere's no instances of "Tabs" anywhere in my code... very upsetting :(
ReplyDeleteIn some places, large chunks of code have been compressed into "..." and I've even expanded those and searched, but still nothing. Why is this? Is there anything I can do?
I COULD NOT FIND THE section in my own html,i only saw a / after 'yes'/>
ReplyDeletewhat would i do?
Hi I tried this but went bad :( I also have a few things I wann tweek on my blog http://www.purrpleivy.com/ and want to know if you could do it for me? I'm happy to pay. Thanks
ReplyDeleteIvy
how to remove the Leaf?
ReplyDeletehi, nice post!
ReplyDeleteJust one problem,is there any way I can stop tab 1 from being a different color to the other tabs, might be to do with my theme, thanks
Thank you so much. I cannot tell you how you helped me.
ReplyDeleteI wished this drop down list in my blog and your help made my wish true.
Thank you so much.
its not working for me .. plz help :(
ReplyDeletethanks a lot for this trick... i removed the radius that made the menu rounded on the edges, how do i remove the margins in right and left to make it extend full width of the page? thank you
ReplyDeleteGreetings. New to blogging and desinging. (not a programmer).
ReplyDeleteI would like to know how to link posts to sub menu. Thank you n advance
I used a drop down menu coding but code not get the desired result as the drop down menu is not completely displaying below the Lead Title.
ReplyDeletePlease check it on my website and respond me.
www.sureshotpost.com
hello there, can anybody help me? I confuse of which red part should I remove? there's a darker red and there's also a light red colors in it. So which of them should I remove?
ReplyDeleteI hope anybody there would help me with this. thanks
hello there, I am just new in blogging and I wanna create navigations with drop submenus but I don't know which red tags should I remove and should I remove the whole line that u told before deleting those red tags? I hope u can help. I spent for this within 2 days and I'm very sad coz I can't get it :( I hope u can help me with this. I'll be so glad if so. Thanks
ReplyDeleteFew minutes ago I posted comment and ask something but yeah I got it for reading the content of your post again. I misunderstood it that's why I didn't got it for 1st try. Thanks for this post. You help me a lot. :)
ReplyDeletehello, lock my test blog
ReplyDeletehttp://teknoceztest4.blogspot.ro/
menu work fine but pointer click title 2/submenu 2.2/submenu 2.2.4/ -problem
how i can small diference betwin submenu 2.2 and this simbol ▶
can u help me?
It is too good. But how to add another link on the menu panel.
ReplyDeleteThis has worked perfectly for my website! Thank you so much!
ReplyDeletehttp://www.livinggringo.com
My menu's background color is not the right one. What can I do?
ReplyDeleteThanks Man
ReplyDeleteWe need more and more Blogger Widget ;-)
You deserve a clic
Greetings from Sardinia
Thanks man, you deserve a clic ;-)
ReplyDeleteGreetings from Sardinia
ps: we need more and more Blogger Widget
Is there an option to remove the leaf picture from the end???? As it is not matching with my website layout..
ReplyDeleteHi Lambert
DeleteReplace the address in the #search part (step 1):
http://2.bp.blogspot.com/-kSPW07r2Ct8/UazXPD9DbfI/AAAAAAAADtE/UyopBgIPe-w/s1600/searchBar1.png
With this one:
http://2.bp.blogspot.com/-y7Bj5zpNXNg/Us2ClFy341I/AAAAAAAAF00/YiRy9v1Bvh0/s1600/searchBar.png
And change the height to be of 30px.
Thank you for helping me so much! A biiiiig hug for you!
ReplyDeleteThank u again :) It fit in perfectly :)
ReplyDeleteI hav a doubt though, the search box searches only the labels and displays or some other method?
because sometimes even if a post doesn't have the label it's displayed...
It will show all posts containing that specific keyword that you're looking for. You're welcome!
DeleteI don't think I'm deleting the correct "red" code in the beginning. My HTML customization box stays all jumbled up on the right sidebar while my pages bar becomes a tiny bulleted list underneath the blog header. Also, any time I try to delete the "red" code an error comes up saying i need a quote for my code HTML attribute or I'm missing and "id".
ReplyDeletePlease help me figure out exactly what to delete. Thanks.
http://ashleyecameron.blogspot.com
it's nice
ReplyDeleteBest and easy tutorial i find to create drop down menu .. after trying many sites which has tutorial for same .. i find my solution here..thanks for great tutorial
ReplyDeleteThanks for posting this, I have added it to my Blog, however I have two problems;
ReplyDelete1- I have a gap between the menu bar and where the content for the post starts; I like to mention that I saw your reply to "Steven Scaffardi" which had silimar problem, but it didn't workout for me !
2- I have a photo slider in center column, but the problem is when I try to go to sub-menus, it appear under that photo slider ! I don't know how I am able to fix it ! would you please help me with that, too. thanks. Here you can see a screenshot of the issue, I hope it help better understanding.
URL of the Image: https://farm3.staticflickr.com/2934/14102171570_b60e4cd9c3_o.png
Thank again.
Hello Mr/ Madam
ReplyDeleteI am Pirath. I would like to say thank to you for a great drop down manu. I want to put my drop down menu to fit with the header photo. On the left side is not fit to header photo. Could you please tell me how make it fit?
http://englishteacherkh.blogspot.com/
Thank u...Thank U..Thank U....
ReplyDeleteHi, drop down menu is not working on me, can you help me on how to fix this problem?
ReplyDeleteThis is my website http://telepreneurcorporation.blogspot.com/
Thank you