This navigation bar made with CSS & jQuery gets semi-transparent when you scroll down the page and is slightly showing up by fading out gradually becoming almost transparent. When the user hovers over it, the menu becomes opaque again.
Inside the navigation we have some links, a search input and top & bottom buttons making it easier for the user to navigate to the top or bottom of the page.

If you want to add this horizontal menu with CSS/jQuery to a Blogger blog, follow the steps below:
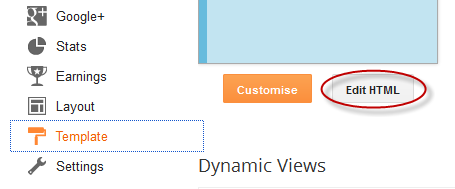
1. Log into your Blogger account and select your blog, then go to "Template" and press the "Edit HTML" button.
2. Click anywhere inside the code area and search using CTRL + F keys, this tag:
6. Finally, search for the following tag:
Credit: Tympanus. This menu was inspired by David Walsh's top navigation bar.
Inside the navigation we have some links, a search input and top & bottom buttons making it easier for the user to navigate to the top or bottom of the page.
If you want to add this horizontal menu with CSS/jQuery to a Blogger blog, follow the steps below:
1. Log into your Blogger account and select your blog, then go to "Template" and press the "Edit HTML" button.
2. Click anywhere inside the code area and search using CTRL + F keys, this tag:
</head>3. Just above/before the </head> tag, add the following scripts and CSS code for the jQuery menu:
<style type="text/css">#nav{height:35px;border-bottom:1px solid #ddd;position:fixed;top:0;left:0;right:0;background:#fff url(https://blogger.googleusercontent.com/img/b/R29vZ2xl/AVvXsEiKpBbxuDEJ4-JxWkBZK3bOonU5bErqmhF4SC1Oo6XRsWqTAirrxmznEl_MxQAJs-2maMohxHtv4SsR9Z5D9kZWuOnTJgTfiSjCNrSKmXbKnq7dJyLIpV8x_obNsMNnpF5yQpvfY51_iSwB/s1600/navbar.png) repeat-x center left;z-index:999999}#nav ul{height:25px;list-style:none;margin:6px auto 0;width:600px}#nav ul li{display:inline;float:left;margin:0 2px}#nav a{font-size:11px;font-weight:700;float:left;padding:2px 4px;color:#999;text-decoration:none;border:1px solid #ccc;cursor:pointer;background:transparent url(https://blogger.googleusercontent.com/img/b/R29vZ2xl/AVvXsEgdegNJcIMqzn9RGfaw8yIZgOVN3ChyMbwh54GoklNXRPJJXZKm5FbHIsqs00Lywm3UA9U1fSoWMklBulA29a-3rL7Cn0O6kgvGhExjji5QkwtB67ijj_BlNaY29sMPRGaoBsJIOlso8Da8/s1600/overlay.png) repeat-x center left;height:16px;line-height:16px}#nav a:hover{background-color:#D9D9DA;color:#fff}#nav a.top span,#nav a.bottom span{float:left;width:16px;height:16px}#nav a.top span{background:transparent url(https://blogger.googleusercontent.com/img/b/R29vZ2xl/AVvXsEhhkiRcXolXZnmrPiyaAsrouqplDG-8CpiTFXkEOdFm3IeWVOFrkXfeBT3iY2Yqfc6gjrAL2sL4jQwLwAOcZKkuHJjS6pgn8pwkoYasj15oIkQ3TFa9yKUcLBgZ0bvJV-dM-EmF7GNMwWaA/s1600/top.png) no-repeat center center}#nav a.bottom span{background:transparent url(https://blogger.googleusercontent.com/img/b/R29vZ2xl/AVvXsEhxv0ZKef7TI8wiuSyh-GaqhQ19-hFSkE2ZnJynx-WPown_SvC7wXVAbTdHuEB1e0rZ4uhCby4LQ5_0ordM1h0_1aEOL3KcvDSfBnBBAo6kIFMRzcCtXTaXtjavPngZSQFVP78LCHN-FHx7/s1600/bottom.png) no-repeat center center}#nav ul li.search{float:right}#nav input[type="text"]{float:left;border:1px solid #ccc;margin:0 1px 0 50px;padding:2px;line-height:16px}input.searchbutton{border:1px solid #ccc;padding:1px;cursor:pointer;width:26px;line-height:16px;background:#E8E9EA url(https://blogger.googleusercontent.com/img/b/R29vZ2xl/AVvXsEhZmWTNc4_-pu3G5-b63MZ5nJOytZIC4jS7x2N9zo6x3GPA-MTNQoLjPbZ_tufUParh7GZABWdGR8fvS3M8G-JBZo7s_Coa0WnrUEQ4V3LKMWdFQ9GeIkVnRU_kGGUbX5QBm__qhNigohxm/s1600/search.png) no-repeat center center}input.searchbutton:hover{background-color:#D9D9DA}</style>4. Next, search for this tag:
<script type="text/javascript" src="https://code.jquery.com/jquery-1.3.2.min.js"></script>
<script type="text/javascript">//<![CDATA[
$(function(){$(window).scroll(function(){var a=$(window).scrollTop();0!=a?$("#nav").stop().animate({opacity:"0.2"},400):$("#nav").stop().animate({opacity:"1"},400)}),$("#nav").hover(function(a){var b=$(window).scrollTop();0!=b&&$("#nav").stop().animate({opacity:"1"},400)},function(a){var b=$(window).scrollTop();0!=b&&$("#nav").stop().animate({opacity:"0.2"},400)})});//]]></script>
<body>If you can't find it, search for this one:
<body expr:class='"loading" + data:blog.mobileClass'>5. Just below/after this code, copy and paste the HTML structure of the menu:
<div id="nav">Note: Replace URL address with the URL of your pages and Link 1, 2, 3, 4, 5, 6 with the link title that will show in the menu.
<ul>
<li><a class="top" href="#top"><span></span></a></li>
<li><a class="bottom" href="#bottom"><span></span></a></li>
<li><a href='URL address'><span>Link 1</span></a></li>
<li><a href='URL address'><span>Link 2</span></a></li>
<li><a href='URL address'><span>Link 3</span></a></li>
<li><a href='URL address'><span>Link 4</span></a></li>
<li><a href='URL address'><span>Link 5</span></a></li>
<li><a href='URL address'><span>Link 6</span></a></li>
<li class="search">
<form method="get" action="/search">
<input name="q" type="text" placeholder="Search..."/><input type="submit" value="" class="searchbutton"/>
</form>
</li>
</ul>
</div>
<div id="top"></div>
6. Finally, search for the following tag:
</body>Just above the </body> tag, add the following HTML code:
<div id="bottom"></div>7. Click the "Save Template" button and you're done adding the menu. Enjoy!
Credit: Tympanus. This menu was inspired by David Walsh's top navigation bar.
wow ..., great tutorial.
ReplyDeleteIs it code is working?
ReplyDeletehttp://bit.ly/KXrI9u
working :) and awesome bar... :D
ReplyDeleteThis is such a nice bar. But I have a problem with "bottom button". Everytime I click it, I go to the top!
ReplyDeleteCan u plz help me fix this, helpblogger?
Here on http://www.sife-dav.org
I can't use search input also :(
ReplyDeleteWhat Change
ReplyDeleteits amazing! thank you bro! and welcome back :)
ReplyDeletehow to make post tag searchable?
ReplyDeleteSame problem with the search box.
ReplyDeleteHi I was just wondering if there is a way to change the font? Thank you so much!
ReplyDeleteU R JUST AWESOME
ReplyDeleteawesome, anyway how to change the width? i need longer menus.
ReplyDelete