This tutorial will show you how to add more information in Blogger posts like author name, display the post date, post labels and comment count links. How does this work? The comment links will display the 'Be the first to comment!' text for posts with no comments and once we get a comment, it will show '1 comment so far'. On the left side, it will show the author name, a clock icon with date for posts published and finally, the post labels.


2. Click anywhere inside the code area and press the CTRL + F keys to open the Blogger search box

3. Type or paste the HTML line below in the search box and press Enter two times to find the second occurrence of it:
How to customize:
To change the icons, replace the urls in blue with those of your images (see this tutorial: how to get the url of an image):
- first url is for the author's icon
- second one is the clock icon
- the third one is the icon for the labels
- the last one is for the comment bubble
Related: How to Add Comment Bubbles to Blogger posts titles
5. Click the 'Save template' button and you're done!

How to Display Author, Date, Labels and Comment Bubbles in Blogger?
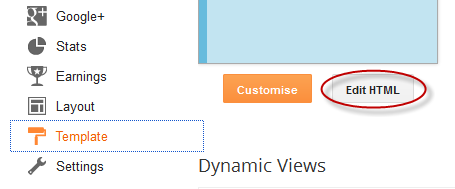
1. Login to your Blogger Dashboard > go to 'Template' and hit the 'Edit HTML' button:
2. Click anywhere inside the code area and press the CTRL + F keys to open the Blogger search box

3. Type or paste the HTML line below in the search box and press Enter two times to find the second occurrence of it:
<div class='post-header-line-1'>Note: If you can't find the line above, look for this one:
<div class='post-header'>4. After this line, add the following:
<div style="margin: 10px 0;"><span style='background:transparent url(https://blogger.googleusercontent.com/img/b/R29vZ2xl/AVvXsEjjWpoERUMTdUY4f8mLZ-v9xd3iKtp28IzZIK-IgZDLlNYhVPl83uTkMrbiiv8fIqHP73kHutpqHtOh31unzwP_nh06ytMwEzTeFVlz0qqULmmK6T0SNW9Zo0sOIgUF5CzFgYVmoeO564Kh/s1600/author.png) no-repeat scroll top left;padding-left:20px;font-size:11px;'><data:post.author/></span> | <span style='background:transparent url(https://blogger.googleusercontent.com/img/b/R29vZ2xl/AVvXsEgo8wFPUnGqIH6ALLyJVcxKwRNvgRWLdwdbgnDBJj1YMkhM6ZL2QKL-KDjN4UHKZCWanjGRZ4YQt6LgmgT65oQJEDXGwb2vKjWiKXLMHT_rzZZDXBOsZI3dg166ryyKSCLNZePRX2Gh7jg-/s1600/clock.png) no-repeat scroll top left;padding-left:20px;font-size:11px;'><data:post.timestamp/></span> | <span style='background:transparent url(https://blogger.googleusercontent.com/img/b/R29vZ2xl/AVvXsEhLLxqfFXpSCWUzS16O41YjugxN_uag4_-RFrBYLQDlYjxbFczWEygnVQkHBWVZ4sl1xEsepUcmmPqRM2iqgk7V6Dsr__2EiS6jl2u5CPdmlh3yVV6B-kgVhqDaedukl72YQONQUmoMqL9v/s1600/tag.png) no-repeat scroll top left;background-position:0px -1px;padding-left:23px;font-size:11px;'><b:if cond='data:post.labels'>
<b:loop values='data:post.labels' var='label'><a expr:href='data:label.url + "?max-results=7"' rel='tag'><data:label.name/></a><b:if cond='data:label.isLast != "true"'>|</b:if></b:loop></b:if></span><span class='post-comment-link' style='float:right;'><b:if cond='data:blog.pageType != "item"'><b:if cond='data:post.allowComments'><a class='comment-link' expr:href='data:post.addCommentUrl' expr:onclick='data:post.addCommentOnclick' style='background:url(https://blogger.googleusercontent.com/img/b/R29vZ2xl/AVvXsEiSv1kmGF1L25JqLpuCOoWm089bGbRQ9ODJal8Mm6-wNa21ZKavRoJCmH1DabPkLjcE42TPHlc5YTBNy6Y-9WgGg0A5nYM_LwzbIgYyPS73N8WMUhhetzfQLSRb4h3s87vsqUZAzW8xkmOH/s1600/comment.png) no-repeat;padding-left:20px;font-size:11px;'><b:if cond='data:post.numComments == 0'>Be the first to comment!<b:else/> <b:if cond='data:post.numComments == 1'><data:post.numComments/> Comment so far<b:else/><data:post.numComments/> Comments so far</b:if></b:if></a></b:if></b:if></span></div>
How to customize:
To change the icons, replace the urls in blue with those of your images (see this tutorial: how to get the url of an image):
- first url is for the author's icon
- second one is the clock icon
- the third one is the icon for the labels
- the last one is for the comment bubble
Related: How to Add Comment Bubbles to Blogger posts titles
5. Click the 'Save template' button and you're done!
Great! Thanks :)
ReplyDeleteyou're wellcome
ReplyDeleteit's not workin for me. i need a code for author and label in every post and is visible in my homepage not in the blog post page.
Deletehow to add comments only in right side of the header
ReplyDeleteHi Dayana,
DeleteI'm afraid i don't understand your question. Can you be more specific?
i think she meant having a comment counter on the right side.
DeleteMy template has 2 < div class='post-header-line-1'/ > codes, but not < div class='post-header-line-1' >.
ReplyDeleteİ loooooooove it!..thank you!
ReplyDeleteHello I'm heaving trouble with this tutorial.
ReplyDeleteThe icons author, date/time, tags appear. Unfortunately the icon "be the first to comment" doensn't appear. Do you know what I'm doing wrong?
This is my blog: http://orientalspiceandsomechocolat.blogspot.com
go to layout > edit blog post widget then check comments button ...
DeleteThanks buddy... cool sharing
ReplyDeleteCoool... nice tutorial.. I have implemented it in my blog http://waytobliss.blogspot.in/ Thanks for sharing it..
ReplyDeleteHi! First off, thanks for sharing this cool enhancement! My blog is also having problems with the comments part showing up. It shows up only for a few seconds while the page is still loading then abruptly disappears, leaving just the author, date, and labels part (I deliberately omitted the labels part though). I have also previously implemented your comments bubble hack, and am wondering whether or not it is causing some sort of conflict. Any help would be appreciated!
ReplyDeleteGreat work! Thanks a lot! I'm using the comment part on my blog.
ReplyDeleteI have some questions.
- How can I make the button direct to the first comment, not to the bottom of comment field?
- How can I make the button always show? When i open a blog post, it is not visible.
Any help will be appreciated :)
not work in my blog, when number of comment is 0, the script does't show anything
ReplyDeleteHey, I have a question. I don't want the date above there. Which part do I have to delete? Thanks for this tutorial! You helped me out a lot :)
ReplyDelete(and sorry for my lack of English, Im a Dutch girl)
Not work... :(
ReplyDeleteI want this under the blog. And how do you hide the real ones in blogger?
ReplyDeleteHello admin.... i tried but no effect
ReplyDeleteNice post bro Thanks for sharing
ReplyDeletewhat about ''Date'' of post
ReplyDeletethis is time of post
Thanks But Comment Box Didnot appear
ReplyDeleteHow do you make the actual box under your post transparent? x
ReplyDeleteHow if use font icon??
ReplyDeleteThanks but does not work with disqus. :(
ReplyDelete