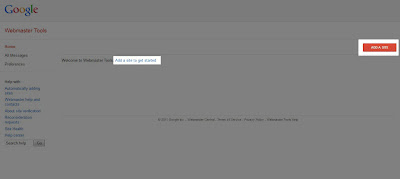
1) Log in to your Google Webmaster Tools account.
2) Click the "Add a site" button at the top of the screen.

3) Enter the URL address of your blog (for example http://my-site.blogspot.com/) and press Continue
4) Select the method you would like to use to verify ownership. Here you can either upload an HTML file with a name we specify, or you can add a META tag to your site's index file.
Choose Alternate Methods:

5) Under Alternative Methods Click Add a meta tag to your site's homepage.

6) Copy the Meta tag Code generated.
7) Open a new tab and login into your blogger account.
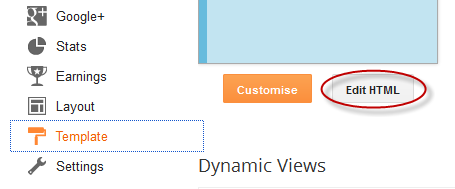
8) Go to Template > Edit HTML

...and search (CTRL + F) for the following tag:
10) Switch to Google Webmaster Tools tab and press on the "Verify" button.
Now your site is added to sitemap account and the verification is done.
2) Click the "Add a site" button at the top of the screen.

3) Enter the URL address of your blog (for example http://my-site.blogspot.com/) and press Continue
4) Select the method you would like to use to verify ownership. Here you can either upload an HTML file with a name we specify, or you can add a META tag to your site's index file.
Choose Alternate Methods:

5) Under Alternative Methods Click Add a meta tag to your site's homepage.

6) Copy the Meta tag Code generated.
7) Open a new tab and login into your blogger account.
8) Go to Template > Edit HTML

...and search (CTRL + F) for the following tag:
<head>9) Just below of it, paste the META code and then click the Save Template button.
10) Switch to Google Webmaster Tools tab and press on the "Verify" button.
Now your site is added to sitemap account and the verification is done.
No comments: